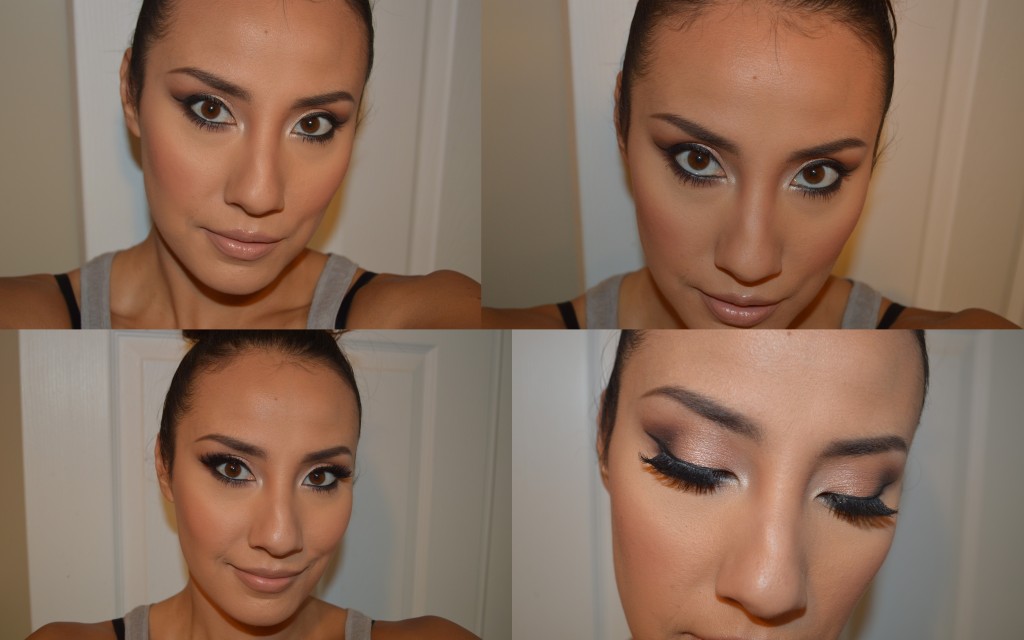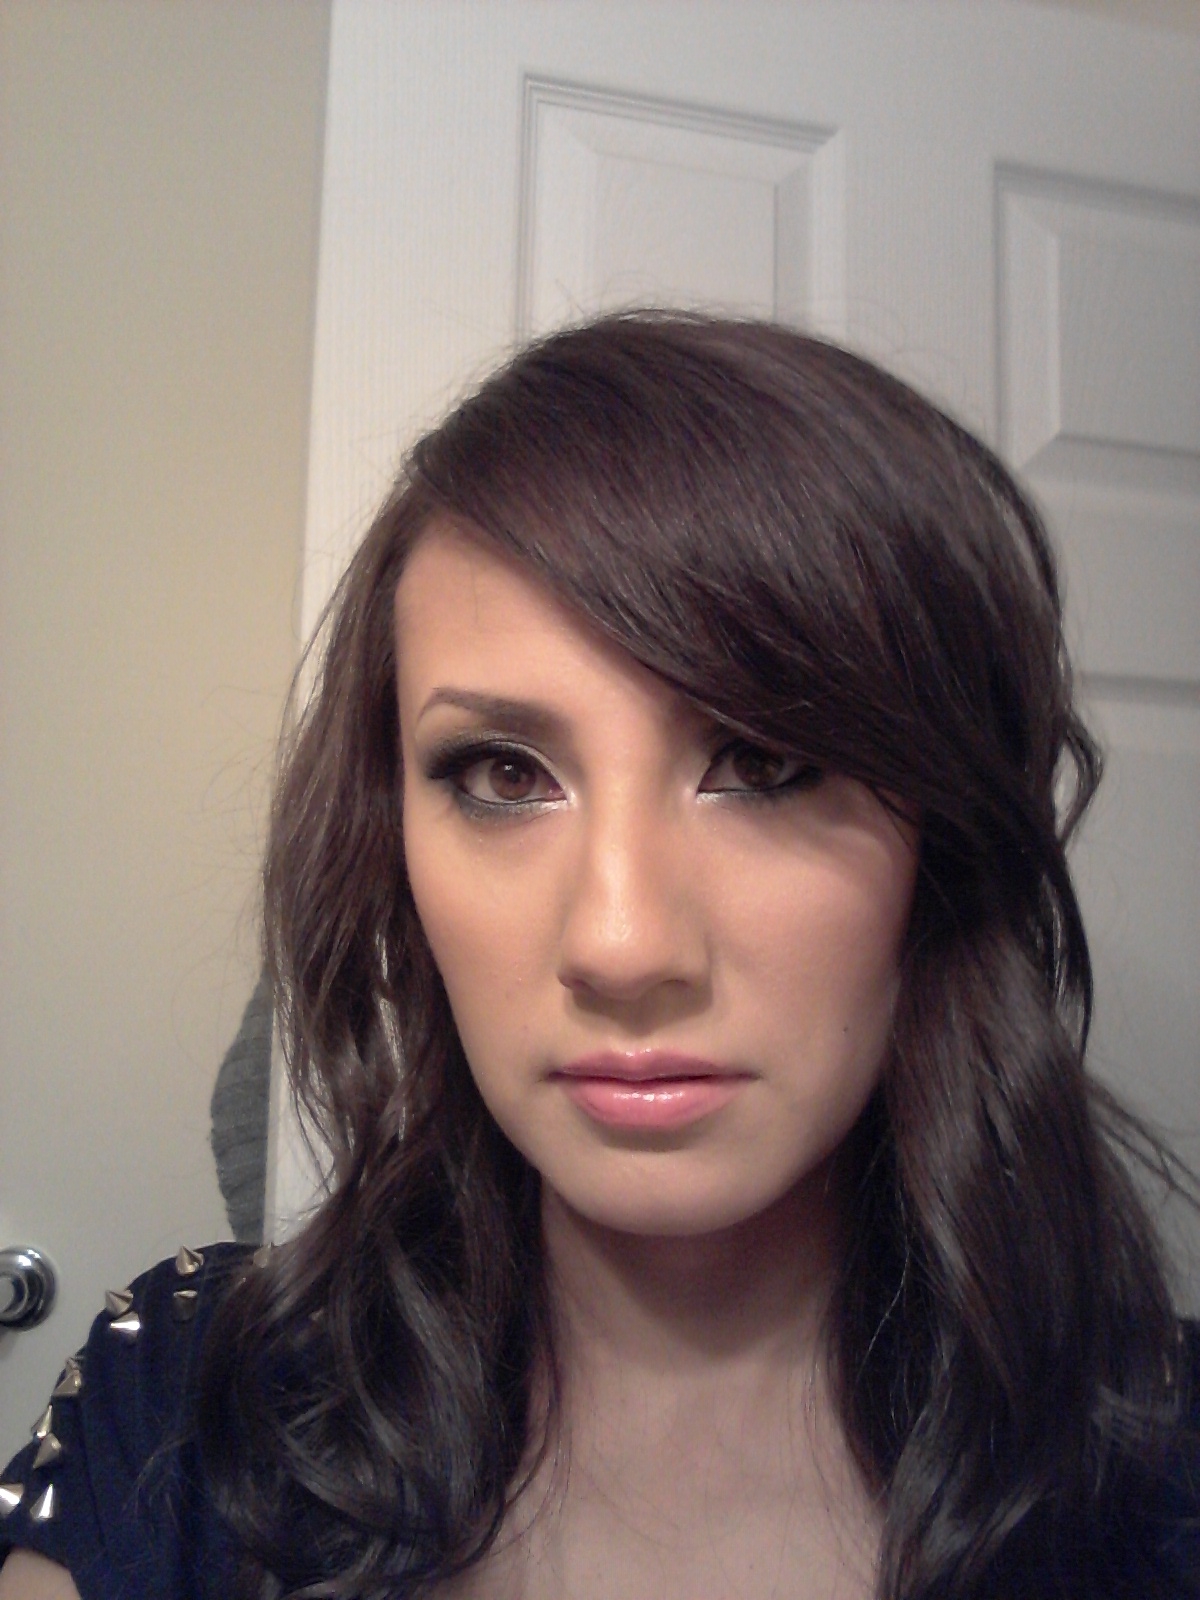
Prom Makeup Tutorial | Graduation 2016

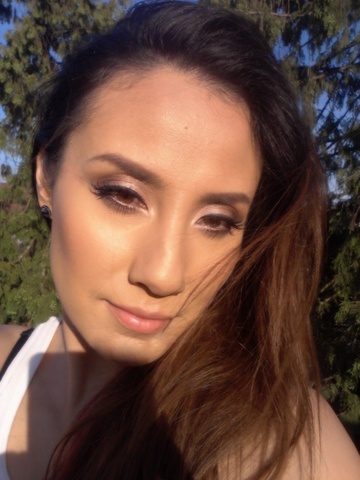
Hi my beauties! Back at it again with a glamorous prom makeup tutorial. This is definitely not a natural look. A lot of my clients request these colours, it is neutral enough that it can go with any dress colour, and easy enough to DIY yourself.

MAC Paint Pot – Painterly
MAC Eyeshadows – Brule, Texture, Swiss Chocolate, Handwritten
Sephora Jumbo Liner 12Hr Wear – Beige Glitter
Bare Minerals Loose Pigment – Bare Skin
Kat Von D Tattoo Liner – Trooper
Monda Lashes -Whispies
Ardell Lashes – #102
Urban Decay Brow Beater – Neutral Brown
MAC Fix +
Make Up For Ever Skin Equalizer – Hydrating Primer
Laura Mercier Silk Creme Moisturizing Photo Edition Foundation – Bamboo Beige
Maybelline Instant Age Rewind Concealer -Neutralizer
Laura Mercier Translucent Powder
Bobbi Brown Skin Weightless Powder Foundation – 4.5
Sephora MicroSmooth Baked Face Powder – Tan
MAC Blush -Peaches
Make Up Forever Pro Sculpting Duo – 01
Sephora MicroSmooth – Baked Face Powder – Light
Mac Eye Kohl – Teddy
L’Oreal Telescopic Carbon Black Mascara
Act 5 Lip Liner – Roseate
Rimmel Latin Finish By Kate Lipstick – #42
Marc Jacobs Enamored Hi Shine Lip Laquer – Love Buzz

Social Share Toolbar

Spring Makeup Tutorial | Teal Pop of Colour

Spring flings in the air…Wanted to do a look that I have been doing for many years. Lots of people want a little colour in their makeup. So here’s a way you can get some colour without the total 80’s vibe.

Make Up For Ever HD Foundation Stick #117, #153
MAC Pro Longwear Concealer in NW25
L.A. Girl Pro Concealer in Porcelain
Laura Mercier Translucent Powder
Make Up For Ever Pro Finish Powder in 118
MAC Pro Blush in Taupe
MAC Select Sheer Powder in NW43
MAC Paintpot in Painterly
MAC Eyeshadow in Soft Brown
Make Up For Ever Artist Shadow in # 536
MAC Eyeshadow in Brule
Make Up For Ever Artist shadow in # 512
Make Up For Ever Artist shadow in # 652
Rimmel Soft Kohl Kajal pencil in 035 Green Shimmer
Laura Mercier Baked Eye Colour in Lagoon
MAC Select Sheer Powder in NC25
MAC Sunbasque Blush
NARS Dual Intensity Blush in Craving
MUFE 9 Artist Shadow Palette #528 & 514
Lancome L’Extreme Mascara
Red Cherry Lashes in #1
NYX Mega Shine Lip Gloss in Natural

Social Share Toolbar

Everyday Makeup Tutorial

Everyday Makeup Tutorial. Simple natural everyday look, great for school, a night out, or even a wedding.

Products I used:
MAC Fix+
Kielh’s Ultra Facial Oil Free Lotion
Make Up For Ever Ultra HD Foundation #117 & #120
MAC Pro Longwear Concealer NW20
Laura Mercier Translucent Powder
Make Up For Ever Pro Finish Powder #118
MAC Eyeshadow in Omega
MAC Conceal & Correct Palette (Med)- Mid Peach
MAC Brow Gel in Girl Boy
MAC Paint Pot in Painterly
Too Faced Bronzer in Sun Bunny
Becca Shimmering Skin Perfector in Opal
Kat Von D Tattoo Liner in Trooper
Make Up For Ever Pro Sculpting Duo in #01
L’Oréal Voluminous Carbon Black Mascara
Red Cherry Lashes in #1
Annabelle Lip Liner in Demure
OCC Liptar in Trick
Duo Lash Glue

Brushes I used:
Beauty Blender
Big fluffy face brush
MAC 266 Angled Brush
Crown Brushes Concealer Brush
MAC 224 Fluffy Crease Brush
MAC 168 Angled Contour Brush
Eco Tools Face Brush
Crown Brushes Small Blush Brush


Social Share Toolbar

Prom Bronze Glow Smokey Eye

Heya ladies, today I have done a prom look for you! With grad coming up just around the corner, I thought I would give a mini tutorial. Both looks are completed, one the left has no false lashes. Big difference eh? I love me some lashes!

Face: MUFE HD foundation, MAC Prolongwear concealer, Nars Casino, MAC Sunbasque blush, MAC Soft and Gentle MSF.

Eyes: Painterly paint pot, Naked Lunch, Texture, Bronze, Mulch. Smolder eye kohl, Zoom Lash Black Lash, lashes from Nigels Beauty Emporium (generic whispies). Brows (Omega, and Charcoal Brown by MAC).

Lips: Rimmel Lasting Finish by Kate lipstick 03, MUFE Lab Shine D16


Social Share Toolbar

How To: Summer Bridal Makeup Tutorial

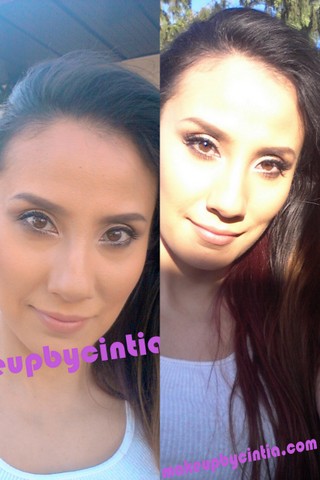
Hello bellas. So I thought that I would put together a glamorous bridal/wedding makeup look. I did the look with and without lashes, to show you what a huge difference, lashes make. If falsies aren’t your cup of tea, just add a few coats of waterproof black mascara, and you’re ready to go.


www.makeupbycintia.com

Eyes:

MAC Painterly Paint Pot placed on the entire lid, up to brow.
MAC Texture E/S placed in the crease, blended up towards the brow bone.
MAC All that Glitters and Texure E/S, mixed to create a rose gold shadow. Place this colour on the lid.
MAC Sketch E/S on outer “V”.
MAC Smut E/S placed on the inner “V” to help darken and define more.
MAC Ricepaper E/S on the inner corners of eye.
L’Oreal Infalible eyeliner in Black. Line top lashline and wing it up towards the end.
MAC Khol pencil in Smolder, placed in waterline.
MAC Smut and Saddle mixed, to blend out liner at lower lashline.
Ardell “120” Demi, doubled up, for a fuller glamorous look.

Face:

Bodyography Clear primer
Cover F/X Camoflage Concealer in Medium. I use this to help correct my under eye circles. The colour morphs to your skin tone…pretty cool.
Make Up For Ever Face and Body Foundation, used all over, blended out with my Beauty Blender, in a patting motion.
Ben Nye Banana Powder to set under eyes.
Graftobian Dual Finish Foundation in Satin Sand to set the rest of the face.
Ben Nye Blush in Golden Amber to lightly contour cheekbones.
Graftobian Dual Finish Foundation in Hot Chocolate, to help deepen the contour of the cheekbones. Also placed on temples, hairline, under chin, and sides of nose.
Ben Nye Blush in Fresh Coral and Golden Amber on apple of cheeks.

Brows:

Light taupey-brown brow pencil to help define brows.
MAC Omega, Charcoal Brown, & Espresso E/S to fill in brows.

Lips:

MAC Lipstick in Fresh Brew
Nude lipliner
OCC Liptar in Hush in the centre of the lips for a pop of colour.

Brushes:

MAC 168
MAC 224
MAC 217
MAC 239
MAC 266
Quo Angle Contour Brush
Real Techniques Base Shadow Brush
Small Chisel Brush
Fine Tip Art Liner Brush

www.makeupbycintia.com

Final makeup look without false eyelashes.

Final makeup look with false eyelashes.

Final Look!

Hope you liked the tutorial, it was an easy look to do, even though it might not seem like it. Comment below and tell me how your look turned out!

Ciao Babes!

♥ Cin 

XOXO


Social Share Toolbar

My Top 10 Beauty and Womanly Pet Peeves

These are just some of my beauty and womanly pet peeves, that have been acquired over the years. I am sure there are way more, but these are the ones that come up often for me.

My Top 10 Beauty and Womanly Pet Peeves

Number 10

Having a really great hair day, when I have no where to go.

Number 9

Not having tampons on hand, when my monthly visitor comes. Having to rush out to buy some!!

Number 8

Chipping or breaking my one nail, while all the others are looking good.

Number 7

Getting the mascara on the bridge of my nose, or by the cheekbone. After I have done my foundation.

Number 6

Lipstick testers with lipstick smashed all over it…gross!

Number 5

Getting a pimple on a day/night where my face has to be flawless.

Number 4

Days where I am too lazy to do my makeup and hair, and running into someone I know…and haven’t seen in a long time.

Number 3

Breaking my hair elastic, and the metal bit hitting the back of my hand. Also not having another elastic in my purse.

Number 2

Rummaging through my purse not being able to find the lipstick I want to wear. Usually pulling out every other lipstick, but the one I want.

Number 1

Forgetting my pressed powder at home…and for this oily T-Zone woman, it is a sin! 🙂

Oh I said top 10, but here is one I also need to mention…Not having anything to wear. I have ransacked my closet, my bed has a small mountain growing on it. I turn to my husband and say: ” I think I need to go to the mall to pick up a new outfit, I don’t have anything to wear.” With a smirk on my face.

What are some of your pet peeves? I know you have some to share. 🙂 Comment below…come on it’s fun!

Social Share Toolbar

New Years Party Look!


Heya lovelies, I thought I would share what I did for my New Years Eve look. I went for a more glamorous look…well really…when don’t I ? :). So here goes my step by step makeup routine. Enjoy!

Moisturizer:

I used my go to moisturizer Embryolisse-Lait-Crème Concentré. Only on my dryer areas of my face. Usually my cheeks, temples, sides of nose, and chin area.

Primer:

I’m loving the Cover F/X Skin Prep. Such a light silky feeling, not thick like some of the other silicone based primers. “It’s an anti-aging foundation primer that repairs. Hydrates and smooths skin to blur the appearance of fine lines and pores”. Who doesn’t want that!!

So I applied the Cover F/X all over my face, you do not need much at all. Maybe a small pea sized amount.

Foundation:

Using my favorite foundation Cinema Secrets, I scooped out a little bit of #302-65A and #303-66A on to the back of my hand. Using my foundation brush I dotted the foundation around my face and blended thoroughly. Using the darker foundation #303-66A, I gently contoured my cheekbones, temples, and the sides of my nose.

Powder:

I like to lightly pat my RCMA No-Color Powder, on to my T-Zone. In a patting motion as to not disturb the foundation, and will help me get more of the oil out. Yay! I usually will use a big fluffy brush, but sometimes the oil is much greater, so I will pat it on with a puff.

Eyes:

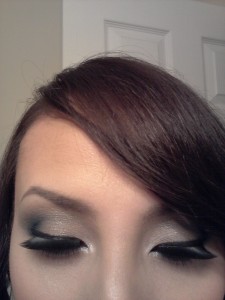
For priming my lids I used, MAC Paint in Sublime Nature. Using my fingers to blend, I brought up the paint to my brow bone.

Lid color I used Yaby e/s – Silver Dust. Silver Dust is a light silver. Apply in a patting motion with a MAC 239 brush. Also applied Silver Dust to the lower lash line.

In the crease I applied Yaby e/s – Twinkle. Twinkle is a dark gray/black with some flecks of glitter. Slightly bringing the color down to the outside corner of the eye, with a MAC 217 brush.

In the very outer edge of my eye (the outer V),I smudged on some Yaby e/s – Carbon Paper. Carbon Paper is a beautiful dark blue color, but when blended out has slight greenish hue to it.

Reapply a little Carbon Paper and Twinkle right into the crease at the outer corner, to help define the eye a little more. Blend slightly.

Inner corner of the eye I blended a bit of Yaby e/s – Baby Sapphire and Ben Nye’s Pigment – Ice. Gives a lovely little twinkle to eye and helps open your eyes up.

I lined my eyes, top and bottom in the waterline, with L’Oreal Infallible gel liner in Blackest Black. Then I put some small dots of pencil liner from MUFE Aqua Eyes in 01, on the outside corner of my eye. I then smudged the pencil with a mix of Twinkle and Carbon Paper.

Curled my lashes with Shiseido lash curler, applied L’Oreal Voluminous – Carbon Black mascara. Then I put on my false lashes from Ardell #138, with DUO lash glue. I like to apply my false lashes with tweezers and looking down a hand held mirror.
Cheeks:

On my cheeks I used Ben Nye blush in the Fashion Rouge Palette – Golden Amber. I used all along the cheekbone and slightly under to contour. Then I applied Nectarine from the same palette on the apples of my cheeks, slightly blending towards my hairline. I used a blush brush from Real Techniques.

Next I applied a little bronzer from NARS in Casino, all around the perimeter of my face, across the cheeks and nose also a little on the sides of my nose.

For highlighting I used a MAC MSF in Soft and Gentle, along the the tops of my cheekbones, and tiny bit on the apples of my cheeks, This helps bring out my flat cheekbones, haha!

Brows:

For my brows, which I barely have any on the ends, I must pencil it in for definition. So what I used was Annebelle pencil in Mink. I framed the brows lightly with the pencil. Then I added powder shadow from Yaby in Firewood, Fresh Earth, and Smoked Maple. For a softer more natural look.

Lips:

Pucker up! What I did was apply Revlon’s Colorburst lipstick in Soft Nude. Then I took a little Stila’s Lip Glaze in Joy, and patted it on my lips. I used my finger, for a more subtle color.

Setting Spray:

For a night on the town, I like to limit the amount of touch up time. As a final step, I like to use my Ben Nye – Final Seal setting spray. It leaves a matte finish, so I will mainly spray around the T-Zone area. Voila and i’m done.


Social Share Toolbar

Welcome Brides!

MakeupByCintia

Welcome to my new website, www.makeupbycintia.com,  I am so excited to be able to share this with all of you!

Please take your time to check out my site. If you have any questions please don’t hesitate to ask.

~Cintia

604.512.4817

info@makeupbycintia.com

www.makeupbycintia.com


Social Share Toolbar